![IO.NET [ Formerly ANTBIT ]](https://files.readme.io/ae596fc-IO_DOCS_.svg)
Docker (Windows)
A step by step process for the Docker Installation on Windows based machines.
First, you need to enable virtualization BIOS.
To check if it's enabled, go to task manager performance so you see here :

If it's not enabled, follow these steps:
- To enable virtualization technology in your BIOS or UEFI settings, you need to access your computer's BIOS or UEFI configuration menu during the boot process. The specific steps can vary depending on your computer's manufacturer and model, but here are the general steps to enable virtualization.
- install WSL 2 by opening the PowerShell as an Administrator. To do this, search for "PowerShell" in the Start menu, right-click on "Windows PowerShell," and select "Run as administrator."
- Run the following command to enable the WSL feature in Windows 10/11:
dism.exe /online /enable-feature /featurename:Microsoft-Windows-Subsystem-Linux /all /norestart
- Then Enable the Virtual Machine Platform Feature while still in the same PowerShell window by running the following command:
dism.exe /online /enable-feature /featurename:VirtualMachinePlatform /all /norestart
- Then set WSL 2 as the Default Version (you might be required to restart your machine sometimes):
wsl --set-default-version 2
Downloading Docker :
-
Go to the docker website: https://www.docker.com/products/docker-desktop/ and click on download for Windows:

-
Run the installation process and after the installation is done reboot the machine:

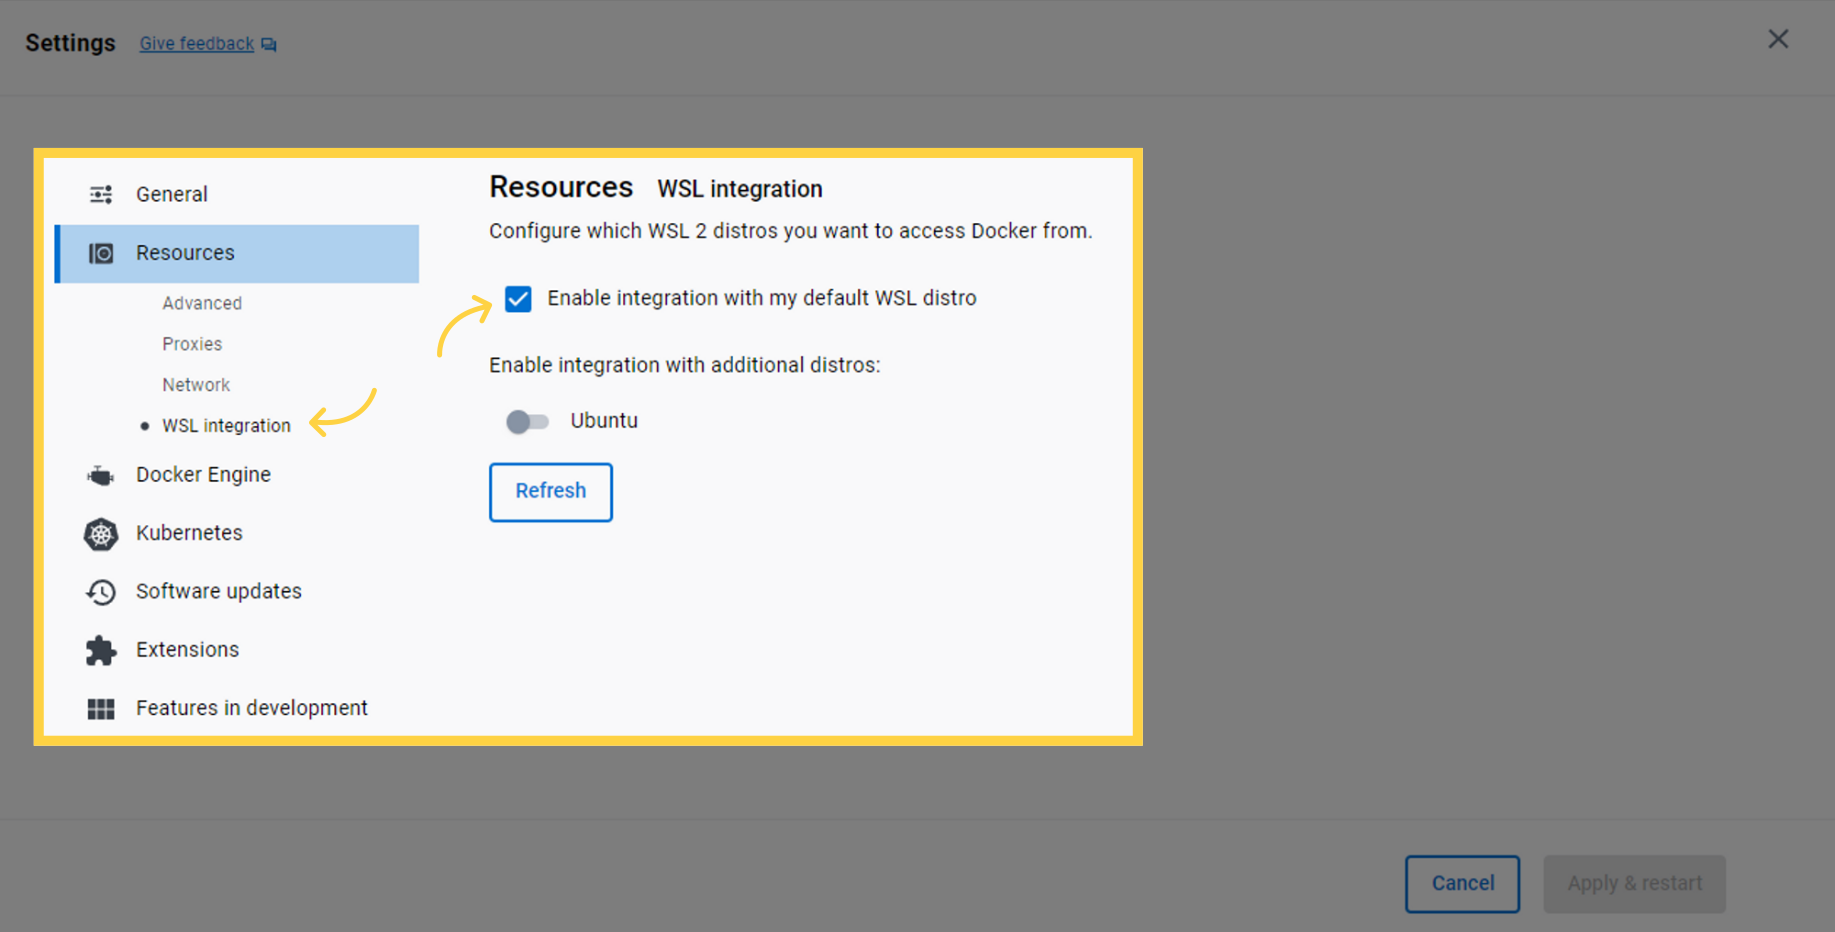
- Start the docker desktop and in docker, select wsl2 to integrate:
- Verify the installation by opening CMD and typing:
docker --version
- You will then receive the following output:
Docker version 24.0.6, build ed223bc
That's it. You have docker installed and ready.
Don't hesitate to join our Discord Community for assistance or inquiries – we're here to help!
Updated about 1 month ago